Home Depot -Do It Herself Workshops
September 18, 2016 • DIY, Out & About
Did you know that Home Depot offers DIH(Do It Herself) classes? And, most are free or with a very small fee?
Yea, neither did I. But, when I did discovered them, I signed up for every one, I could.
I attended my first, of many classes this week and I came away feeling like I could do anything.
I signed up online and it was easy, just pick your store, pick your project and done.
Sign up online at Home Depot
Upon arrival at Home Depot, check in at customer service on class location, mine was held in the lumber area.
I met John and Kim, who work for Home Depot and taught the class.
John was the lumber guy, and he gave tips and tricks on not just the project that we were building, but other needed info.
It was as step by step, hands on, measure twice, cut once or twice, sawdust in my flip flop, Lol in the lumber aisle kinda fun.
And, in the end, I came away knowing more about power tools, how to drill a 5 degree angle, cut a circle out of wood and I have a "totes adore" wheel barrow for my yard.
My completed wheelbarrow project.
So, grab your girlfriends for some fun and head over toe your local Home Depot.
Who would have thought a girls night out in the lumber aisle.
Happy Fall Ya'll!
Easy Baked Chicken
August 6, 2016 • Cooking
So, I was cruising thru Buzzfeed a couple of days ago today
and saw this amazing delicious looking dish.
and saw this amazing delicious looking dish.
All day long I thought about it, and dreamed how easy it was and hoped it tasted as good as it look.
I rushed to the grocery store and found the 4 simple ingredients needed to make this dish for
Easy Baked Chicken.
You will need:
Roma Tomatoes
Pesto Sauce
Shredded Mozzarella Cheese
Chicken Breast(the thinner breast works well)
I rushed to the grocery store and found the 4 simple ingredients needed to make this dish for
Easy Baked Chicken.
You will need:
Roma Tomatoes
Pesto Sauce
Shredded Mozzarella Cheese
Chicken Breast(the thinner breast works well)
Lay chicken breast in a large baking dish
Top each piece of chicken with a spoon full of pesto or enough to cover
slice tomatoes and cover chicken with tomatoes
Cover entire dish with shredded cheese and bake
Bake in 400 degree oven for 40 mins and Bingo, dinner is ready.
Enjoy!
Back to School Roundup- Helping make those first few weeks easier.
August 4, 2016 • back to school, Create and Craft, organization.
Hello August! If you haven't started back to school in your area, you will soon. We go back Aug 29th, well technically, I go back a week early.
Did ya'll know that I also work in a Middle School? Yep, I work in the cafeteria and it is really the perfect job. I get to work after kids are in school and, I am always off to pick them up.
Check out your school system, maybe they are hiring. It's a blast.
I have put together a roundup of some post to help you prepare for the hustle and craziness, that comes with going back to school.
I think kids crave routine to a point, I know I do.
Hope all of you get settled in soon, with your sanity intact.
Check out how a few fellow bloggers will help you get started.
~~~~~~
 |
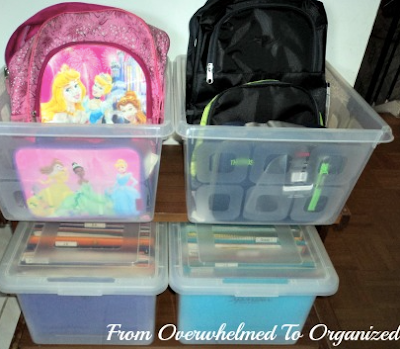
I offer a free printable to keep everyone on track for supplies.
I know back to school brings very early mornings, lunch packing. car pooling, conferences and a string of other responsibilities, but if we are organized, don't you feel a little more prepared.
Happy Back to School!
Making String Art
July 24, 2016 • crafts, Create and Craft, stringart
Good Morning! I have been away for a while, you know how life gets a little crazy sometimes.
I think I just keep riding the crazy train, and never get off when it stops at the station. Toot Toot, the crazy train has left the station, for now.
Ok, enough of my lost humor on ya'll, let's get to the fun stuff.
I have rediscovered string art and forgot how much pain and joy it can be at the same time.
I started with something rather small cause, I haven't made string art since high school.
You will need to find the right size board for the project you are making.
Color sting or yarn and believe me, the colors are endless.
Wire nails. I prefer the 3/4 X 17, but you can use any size you like
a small hammer and a dirty towel
You need to find a pattern online of the design you want to make.
I just googled arrows to get the pattern I needed.
I started with something with straight simple lines, just to get the hang of it again.
Resize your pattern to the size of your board and cut out, just the design itself.
You can stain the board or paint it, either way is up to you. I like the stain look, but I have now started to use paint on my boards for a different look.

Lay cut pattern onto board in the design and direction you want the finished project
Nail the corners first, as that will hold the paper down and you can also establish some kind of nail pattern to keep them even.
Lay a towel down to muffle the hammer noise a little if you are doing inside.
After all the nails are in place, remove the paper pattern to begin stringing.
Sorry, I skipped the step of stringing the string, but you pick a color and tie a knot on the corner nail of the pattern, do not cut. Then just start wrapping the string around the nails over and over agin.
This is the finished product, and as you can see after I did the white string, I went over the edges with a blue string to add the outside lines.
Welcome back String Art we have missed you! If you are looking for inspiration just visit Pinterest, and search String art, wow at the talent out there.
Thanks for joining me!
Painted River Rocks
January 9, 2016 • crafts, Create and Craft, Painting
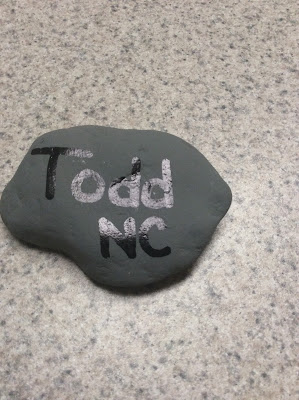
Back in the summer we went to Todd, NC and spent the day tubing on the New River. Let me just say that tubing is one of my favorite things to do, in the dog days of the summer.
We use a shuttle company that takes us up the river and then, we float down to our starting point. Lazy, slow and the beauty of the mountains is so relaxing.
I like to gather rocks when we stop to play and splash in the water. I also have my float weighing heavy when I get back because of all the rocks.
Gather flat smooth ones and bring home, wash dry and create something fun. I did this "M" for my last name and the Todd one because that is where it came from. Have fun tubing and painting.
The only step not shown is spraying your rocks with a poly to protect them and make them shine.
Rock On People!
Subscribe to:
Posts (Atom)


